Angle Grinder Safety Tips & Common Mistakes - Tool Guide
Almost everyone I know has an angle-grinder horror story
Most of the time it's a "friend-of-a-friend" story, but that doesn't make it any less terrifying. In my experience, most angle-grinder accidents happen when the operator isn't entirely confident in what they're doing.
Of course, that doesn't help first-time users, as takes time to get comfortable. If you're new to angle-grinder operation, here are some angle-grinder safety tips and common mistakes to avoid.
Changing the Discs
Here's a scenario: You're cuting a piece of steel with a dedicated cutting disc much thinner than a regular grinding disc. Once the steel is cut, you choose to de-burr the edges by grinding them smooth.
However, instead of taking the time to swap the cutting disc for a thicker grinding disc, you think to yourself: "Ag, it's only a couple of edges. I'll just use the cutting disc and press gently".
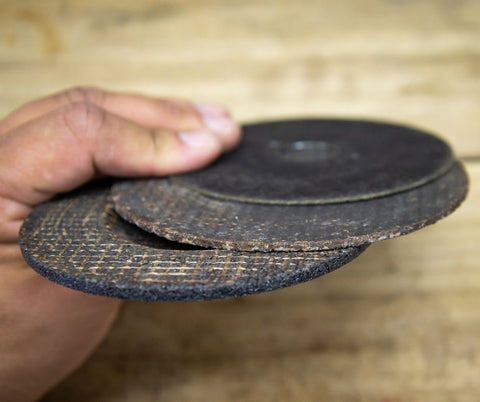
The problem is, cutting discs aren't designed for lateral forces. When you use the face of the disc in this way, it not only gets dangerously thin, it flexes to a point where it inevitably shatters at high speed.
It's important to read the information sticker on the disc to ensure you're using the right disc for each material.
Lastly, most general-purpose angle grinders feature a maximum disc diameter that must be adhered to. Exceeding this specification could not only push the grinder beyond its abilities, but the disc itself may not be able to handle the higher revolutions.

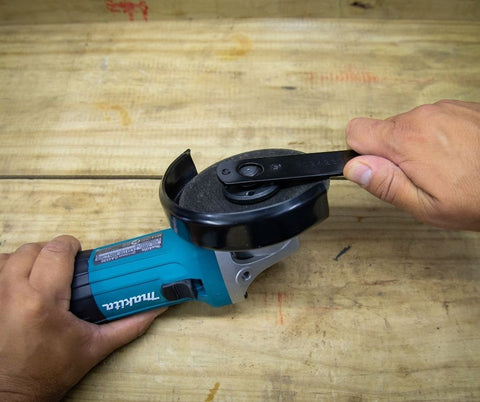
(Above image) Always take the time to swap disks for the correct application, and be sure to use the supplied spanner to properly tighten/secure the grinder's lock nut.
ANGLE GRINDER KICKBACK
"Kickback" is what most people fear when they think of operating an angle grinder. This is when the disc "bites" into whatever you're cutting and violently "kicks" away from the job. Making sure the cutting disc stays perpendicular is the first step toward mitigating kickback.
You want to ensure that the item you're cutting is either clamped in a vise, securely supported on either side. That way it can't shift. For example: If you're cutting a sheet of corrugated roofing or ceiling board, the sheet/board should be supported in the middle so that it doesn't collapse inwards and pinch the disc.
Get this stand to make grinding work a lot easier and safer
Regarding disc placement, use the 8 or 9 'o clock positions on the disc's circumference when cutting most materials – where 12 'o clock is considered the top of the grinder. Lastly, if you lower the grinder's body below the cutting height, the grinder's weight helps control some of the kickback and movement.
If the disc does bite, you want the grinder to "kick" away from you, not backwards towards you. On that note, it's always good practice to offset yourself to the side of the angle grinder's line of operation.

(Above Image) Cutting disks should be supported on either side when trimming or cutting boards/sheets. This will prevent the material from collapsing inward and pinching the blade.
Use discs you trust
In my experience, I've seldom had brand-new discs kick back on me. Old, cheap, or blunt discs are a leading cause of angle grinder accidents. If you use high-quality discs and discard anything you're unsure of, you significantly reduce your chances of having a dangerous angle-grinder experience.
View a wide range of angle-grinder discs here

Angle Grinder technique
In a perfect world, you'd only operate a grinder where you can get your weight – and a firm stance – behind the tool. In reality, there may be times when you're forced to cut or grind something above your head, or worse, while standing on a step ladder.
View essential angle-grinder safety gear here
If this is the case, make sure the ladder is securely planted on the floor and that you can't easily fall while holding a power tool that’s spinning at 11 000 rpm. Better yet, use scaffolding if it's available.
In terms of grinding overhead, unfortunately, the weight and strength of your arms will be the only thing fighting the feedback from the tool, so make sure you take a break and don't over-fatigue your arms and shoulders.

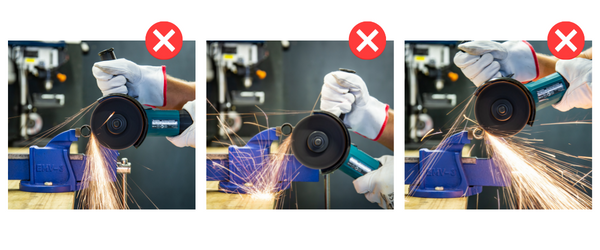
(Above pictures - Wrong way to hold an Angle Grinder)
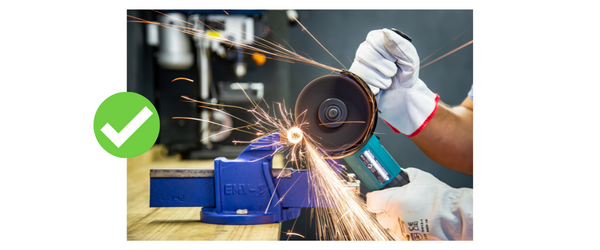
Images 1, 2 & 3 show where NOT to use a cutting disk on its circumference. In the fourth image (below), you'll see that the preferred placement is at the 8 or 9 'o clock position. What's more, you'll notice that the grinder's weight is held below the cutting height for better kickback resistance and control.

(Above Image) The correct way to hold an Angle Grinder
Confidence is key
As mentioned at the start of this blog, confidence is everything when operating an angle grinder. If you feel in control, you can even bend the rules regarding conventional operation. However, it all comes down to confidence, which is difficult to explain because… well, how do you define confidence?
For me, it's knowing how to firmly control the tool so that you're actively fighting the forces at play, while acknowledging that if the tool does decide to do its own thing, you need to be fluid enough that you can go with the flow and not be in harm's way.
Perhaps the best way to describe this is to think of a vehicle breaking traction on a wet road. Once this happens, you cannot do much to fight it; however, you can still control the wheels' direction until the tyres find traction again.
On that note, here are a few more angle-grinder safety tips and precautions:
- Always wear protective clothing – including gloves and eye protection
- Always have the guard fitted and rotated to where it offers maximum protection
- Keep both hands on the power tool
- Never try to hold the item you're cutting or grinding
- Don't apply too much force to the power tool
- Be mindful of sparks and any potential combustibles nearby
- Be aware of the people around you and make sure they're not in harm's way
- Wait for the disc to stop spinning before putting the angle grinder down
View our angle grinders.
SUBSCRIBE to our newsletter here for more Tool Talk.
Written by - Grant Spolander

Comments
Leave a comment